Ceci comprend l'appareil de mesure, un coffret de transport, des broches de contact de rechange pour l'appareil et l'électrode 21-E.
Ceci comprend l'appareil de mesure, un coffret de transport, des broches de contact de rechange pour l'appareil et l'électrode 21-E.
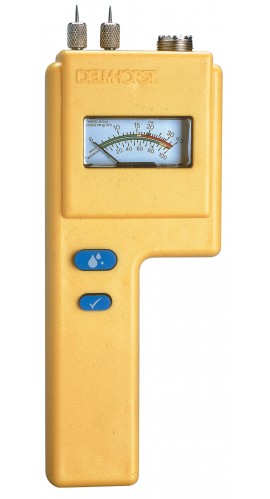
Caractéristiques
| Catégorie | Pénétrant |
| Gamme de l'échelle de référence en mode broche | 0% à 100% relatif |
| Gamme de l'échelle pour le bois en mode broche | Teneur en humidité de 6% à 40% |
| Informations sur la garantie | 1 an sur les défauts de matériaux ou de fabrication (excluant l'étalonnage) |
| Catégorie | Pénétrant |
| Gamme de l'échelle de référence en mode broche | 0% à 100% relatif |
| Gamme de l'échelle pour le bois en mode broche | Teneur en humidité de 6% à 40% |
| Informations sur la garantie | 1 an sur les défauts de matériaux ou de fabrication (excluant l'étalonnage) |